Now we are moving on to the finishing touches, the functional control bits, the 'add ons' the 'fripperies' ...
I've coupled up all the closed loop rudder and elevator wires using 30lb fishing trace wire and 1.4mm crimps (useful stuff fishing equipment

) - all working fine ...
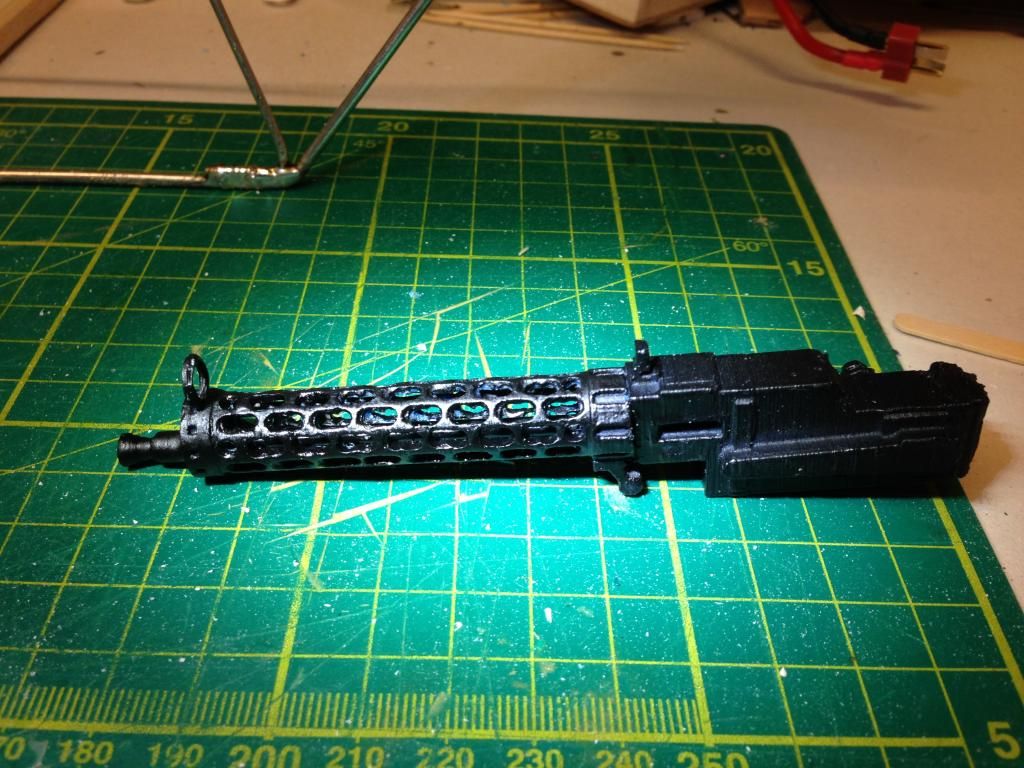
I mulled over the possibilities of a potential 3D printed Maxim/Spandau gun and finally decided to adapt a 'solid' one I bought earlier which (disappointingly) had a solid air cooling jacket and no barrel visible (obviously)..

So I cut the one I had into several bits and set about it with the flexible Dremel and a dentists tiny round burr I was given years ago - I then discovered that the barrel part was actually hollow so there wasn't much material to remove. However, the holes drilled left quite a flimsy structure and, as usual, things got messy and some of the structure broke off

This led to me having to put an 8mm drill through the end of the barrel unit and then make an 8mm aluminium rod on the lathe the same as the diameter I'd just drilled - I then lightly greased that before inserting it and then adding small quantities of P38 filler - when dry I redrew the frame hole matrix with a pencil on the filler - withdrew the aluminum rod and drilled out the filler to regain the hole matrix. I then soaked the filler bits in CA to add a bit of belt and braces strength.
Then I drilled the muzzle end and added a 3mm carbon rod as a barrel - which was obviously absent on the solid original - then rebuilt all the guns parts I'd previously sawn up and added some good old Humbrol Matt Black ...
So I ended up pretty much 'making' one from a 'kit of parts' .... Quite pleased with the result - you can't see the barrel in this shot - but there is one going from the muzzle to the breech inside the framework

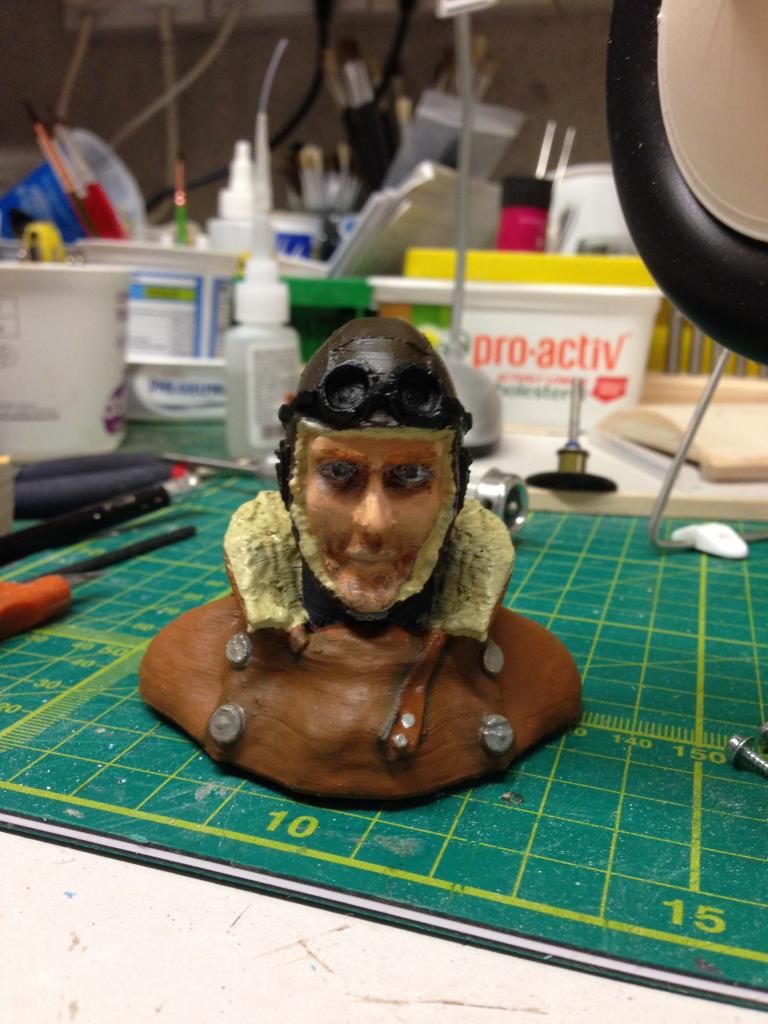
I then painted the pilot bust I bought not being confident enough to carve my own .. he looks suitably sinister

I am currently filling in the 'hollow' goggle frames with small amount of mixed epoxy resin which looks remarkable like glass when dry

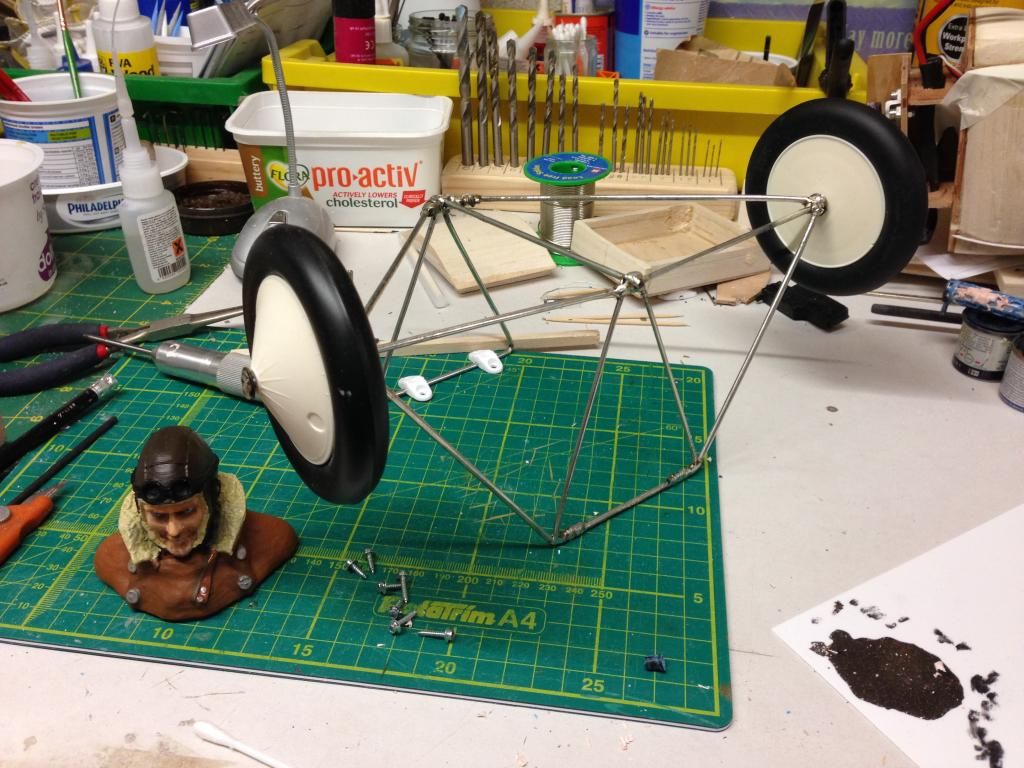
I then had to make the undercarriage frame - lots of wire measuring - bending - cursing - rebending - ruining - starting again etc etc - then soldering it all up using a jig I built to hold it all relatively straight (and even then its not perfect

Onward - I've now got to cover the front fuselage sides in 0.5mm plasticard which will eventually be sprayed 'aluminium' to match the cheeks and cowl which are also 'aluminium' ... they will also be covered with tissue and dope and sanded before spraying to give a uniform finish.
I have yet to work out how to use 'keyhole' shapes to attach the cowl as the battery will be inside the top of the cowl so it need to be removable yet secure - magnets (my usual battery hatch method) wont suffice in this instance

Then on to making what, on mine, will be a dummy framework of piano wire and more trace wire to make the wing 'braces' ...
Lots yet to do